Best Phoenix Molly Lineups For Bind

As any seasoned Valorant player will attest, the tactical depth and versatility offered by the game's various agents can dramatically shift the tide of any match. Among these agents, Phoenix, with his unique molly ability, has emerged as a favorite for many. His dynamic playstyle, combined with the right lineups, can effectively dominate the game's strategic landscape. But, the million-credit question is - what are the best Phoenix Molly lineups on Bind to maximize your success rate?
In this comprehensive guide, we delve into the most effective and game-changing Phoenix Molly lineups that the professional scene has seen in 2023. From the utility-centric to those designed purely for executes, these lineups promise to give you the edge, whether you're grinding the ladder or duking it out in high-stakes tournaments.
We will dissect each lineup in terms of its positioning, utility, timing, and its compatibility with other agents' abilities. Additionally, we will provide you with pro tips on how to best utilize Phoenix’s utility kit and the agent in varying in-game situations and map locations, so you can outmaneuver your opponents every step of the way.
Phoenix Molly Lineups
Phoenix’s is not the highest dealing damage Molly in the game. However, what makes it unique is how fast and versatile that piece of utility is, allowing you to combine your kit a lot more fluidly to achieve more in-game. With the usage of Phoenix molly lineups that the pro scene has witnessed, you will be able to play phoenix like a professional and show your opponents who’s boss. Here it comes, the list of best lineups you can use in your next match:
A Site - Showers

What Does It Cover: Starting with a piping hot lineup towards A, specifically right outside of A Showers. This molly will land right on top of the boxes on the right side, which is a tricky corner to clear.
When To Use It: Best used to clear the tricky spot on showers, as coming out there can be tough due to the multitude of angles that can easily overwhelm you as an attacker. So next time you are attacking Showers, make sure to use this lineup.
What Makes It Special: This molly is very easy to perform, it lands fairly quickly in time with your execute which makes it great for a fast push.

To do it, come stand on the ledge right in front of Showers, aim your crosshair right on top of the triangle bricks (the middle one to be specific) and then simply jump and throw your molly.
A Site - Default

What Does It Cover: Secondly on A site, this lineup will land directly on the default planting spot in front of Trucks. This will ensure to get anyone off defusing the spike.
When To Use It: Best used in a post-plant scenario as this molly will help you get any enemy off the spike in time while playing from a safe spot on short.
What Makes It Special: This lineup is perfect as with Phoenix, it is pretty uncommon to use post plant mollies so it will definitely catch most enemies off guard.
To do it, come over to this corner and aim your crosshair at the top of the leaf just like in the picture, and then run + throw your molly.
B Site - Hookah

What Does It Cover: This insane molly lineup will land directly on the left side of Hookah, it will clear the left side with the exclusion of the boxes as enemies can climb up on top of it and use that as cover from the molly, however, that is unlikely.
When To Use It: Best used whenever you have a heavy execution towards B hookah, whether it is to fake the site or to fully enter, this is a great molly nonetheless.
What Makes It Special: It is very easy and quick to perform this lineup, which makes it a great pick to surprise enemies that you know will be playing on that spot.

To do it, stand on the right side of the barrier and then aim your crosshair at the bottom left of the solar panels, Simply jump and throw your molly from there.
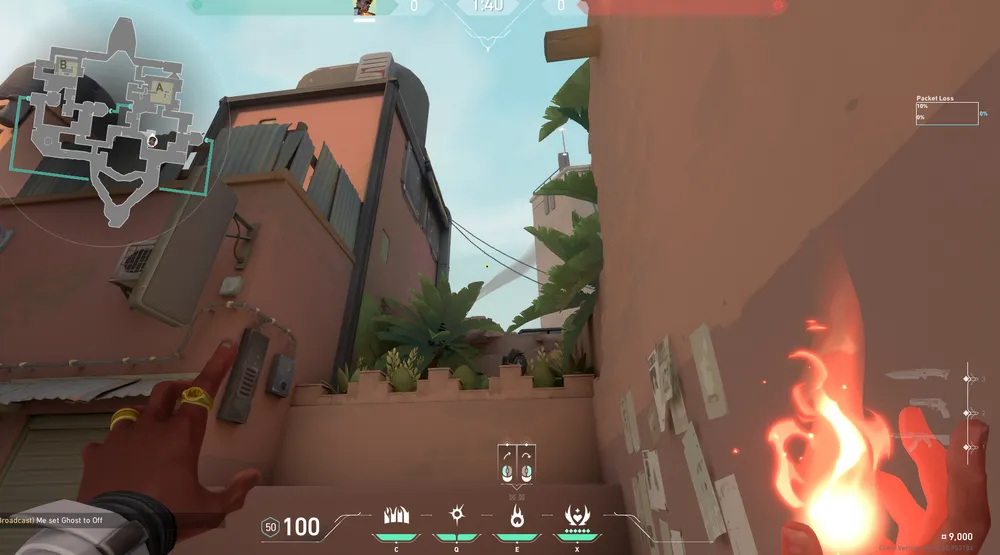
B Site - Cubby

What Does It Cover: Over to the very last lineup on B site, this molly is exceptional as it lands on the cubby clearing the way out to any teammate going out of CT.
When To Use It: Best used in retake scenarios, often times when retaking B site this can be the right course to take as it clears your teammate’s pathway to open up site having one less angle to stress about.
What Makes It Special: Since this is a new addition to the map Bind, enemies often will be confused and will not expect this molly coming.
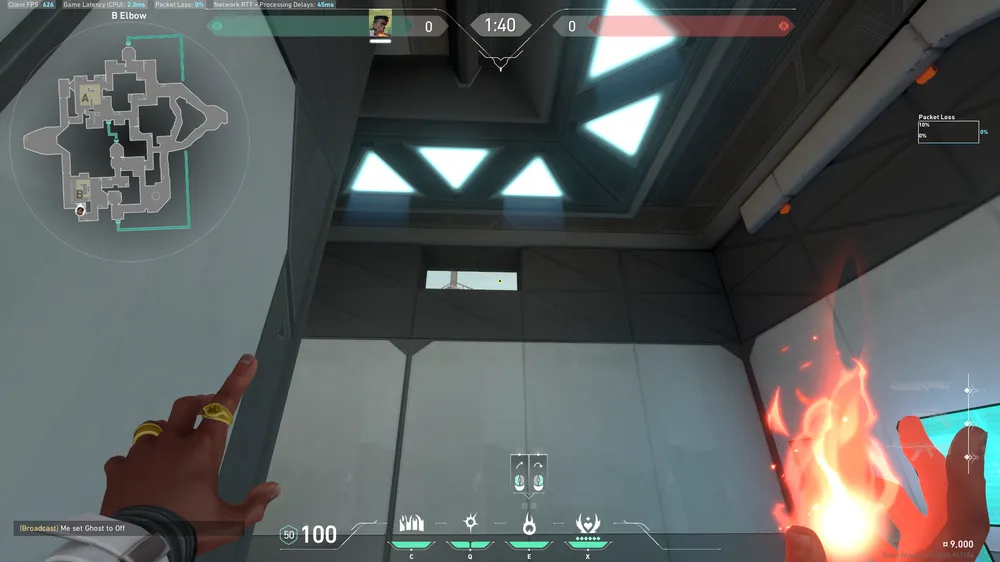
It is not a pixel-perfect lineup, simply come over to this spot on Elbow and throw your molly. You have to run + throw.
Pro Tips
- Phoenix’s Molly is versatile, it travels quickly but drops down after a certain amount of time limiting its travel distance. Unlike other mollies, you will need to know where and how your molly stops in order to use it most efficiently.
- When playing Phoenix, you should always combine your mollies with other utilities that you have in your kit as flashing after can grant you easy free kills, this is how the agent is meant to be used.
- Don’t feel shy to ask your teammates for any piece of utility such as reveals, astra pulls, or deadlock’s lock as it helps you guarantee kills or at least, deal devastating damage that will help you through the round.
- You can always use your molly or wall to heal if you received any sort of damage through the round, it is not a must to use your utility in a certain place or spot as it is entirely up to you.
- Keep in mind that Phoenix’s molly deals damage slower than other similar abilities in the game which gives room to work with for opponents, as long as you understand the timing of your ability you will still be able to shine through and earn kills easily.
- The molly is your main ability, meaning that every time you get 2 kills you will be able to use it again allowing you to combine heals, lineups, and multiple different usages as long as you keep fragging.
- Your molly’s damage will not transfer through walls, if it is placed on top of A Heaven it will not hurt anyone on Under, unlike some other abilities in the game. So it’s important to keep that in mind.