The Best Wallbang Spots For Breeze
Whether you're a casual player or an aspiring pro, every Valorant player is in a constant hunt for the edge that turns defeat into victory. In the dynamic, fast-paced, and strategic world of Riot Games' hit tactical shooter, knowledge is your most potent weapon. Knowing where to aim, where to plant the spike, and how to best use each agent's abilities can be the difference between clutching a win and facing a crushing defeat.
However, one aspect of Valorant that can truly separate the good from the great is mastering the art of Wallbangs. This tactic, which refers to shooting through penetrable surfaces to hit enemies hiding on the other side, can catch opponents off guard and turn the tide of a battle. In this article, we're going to guide you through the best wallbang spots in Valorant, arming you with the knowledge that can boost your tactical prowess and leave your enemies wondering, "How did they do that?"
We will take a dive into the world of Valorant and uncover the hidden secrets that lie behind its destructible walls. Here you will find the best spots to wall bang on the map Breeze.
Wall Bang Spots
Now before we head and reveal the secret spots on this map that even you may have not thought about, pay attention to the details provided as we will talk through the penetration levels and what usage each spot is good or best used for. Mind you, we will take a look at a diverse variety as there will be attacking, defending and even post plant set ups. Let’s get right into it:
A Site - Main
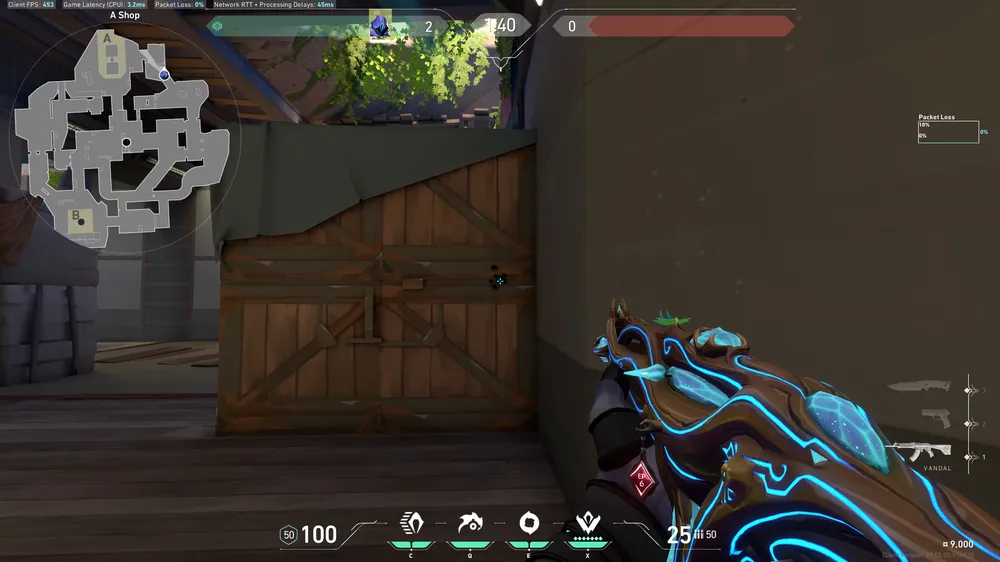
What Does It Cover: This wallbang spot on A main will clear anyone who has progressed up to the shady corner behind the wooden boxes. Although, keep in mind there is a little box that enemies can sit on top of so you could raise your aim a little bit to clear anyone there.
When To Use It: Best used if you are “contacting” A main which means you are pushing it and you are willing to clear corners before you burst into site.
What Makes It Special: This wall bang is pretty easy and it would deal great damage and destroy set crossfire very easily winning you rounds.
Penetration Level: Medium To High
Mid - Elbow
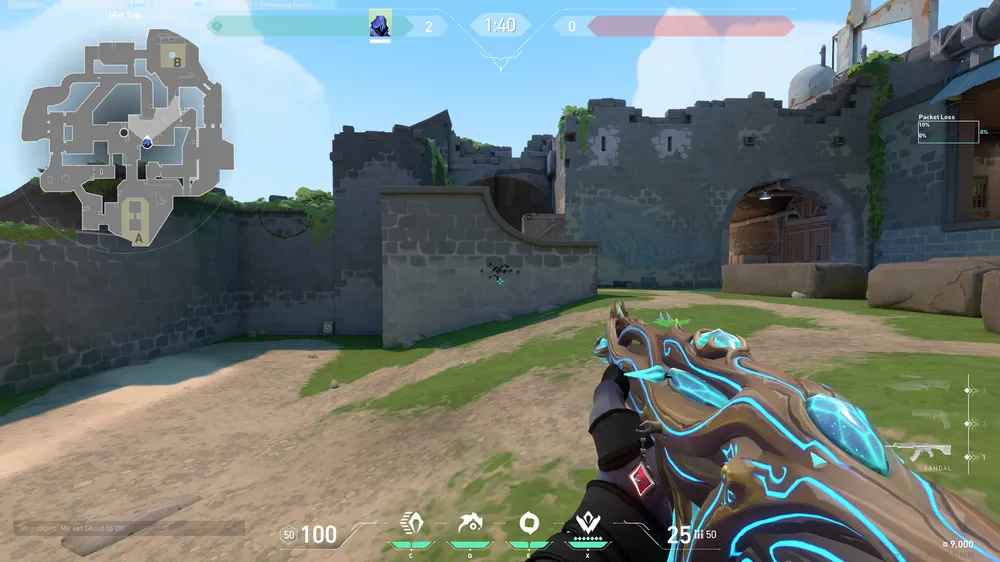
What Does It Cover: This wallbang spot on mid will hit anyone coming up from Elbow whether they are going to B Tunnel or going to explode on site.
When To Use It: Best used when you are planning to take mid duels and using this spot you can clear out anyone there, or if you are in a fight and they took cover you can shoot them through the wall to finish them off.
What Makes It Special: It’s a pretty common wallbang but it forces enemies to respect peeking you around that area to avoid getting shot through,
Penetration Level: Medium To High
Mid - Double Doors
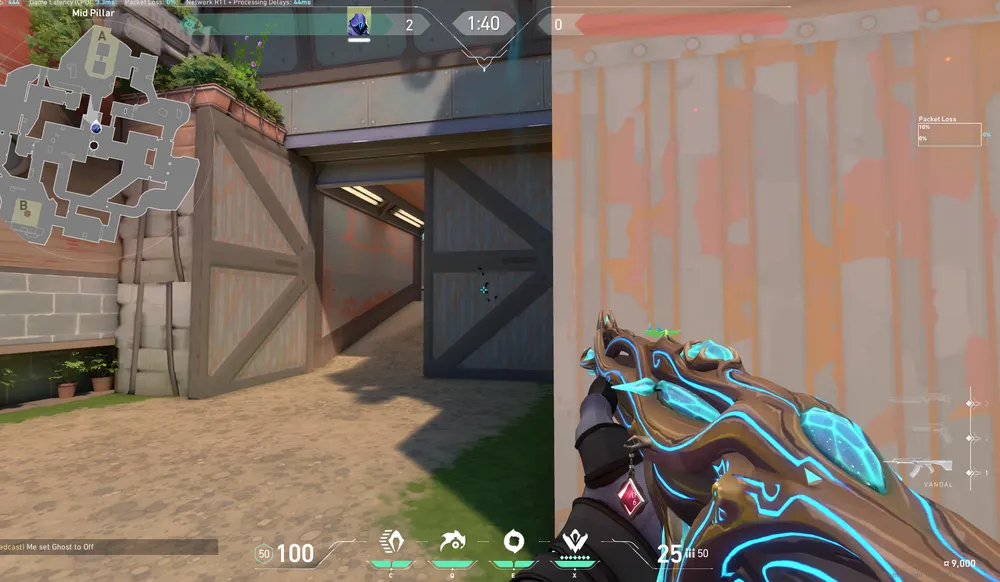
What Does It Cover: This wall bang spot will hit anyone on double doors. These doors are made of a material that you can shoot through easily to pre aim and deal damage to enemies.
When To Use It: Best used when you are looking for an easy pick either to even player numbers or on an eco round, it’s best to pair it with a sova arrow as this can guarantee the kill much easier.
What Makes It Special: By using a sova arrow and this wall bang you will force enemies to back off and respect the space you demand on mid.
Penetration Level: Low To High
B Site - Backsite
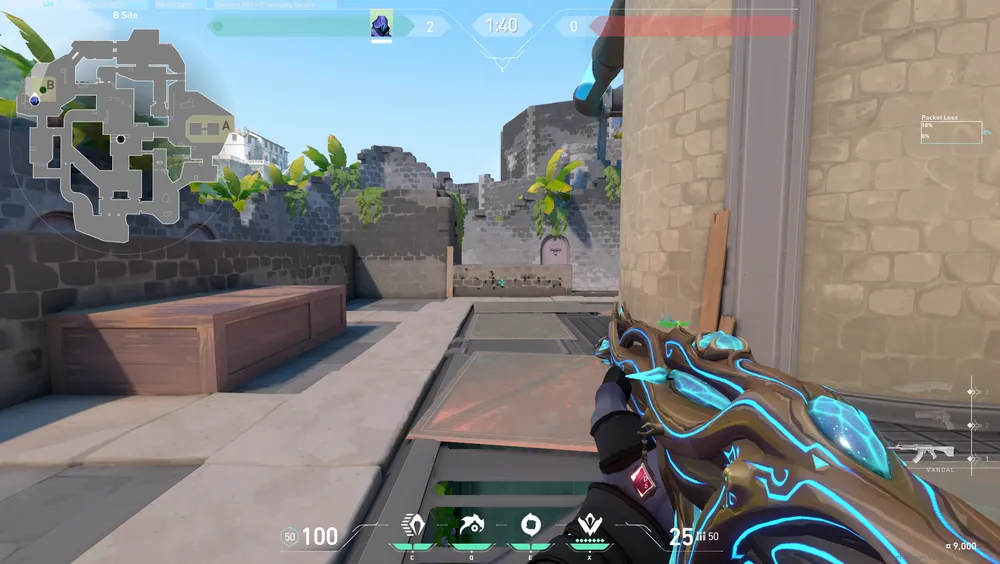
What Does It Cover: This spot will directly hit one of the most commonly played spot on B site which is backsite, right behind the thin walls that are spread across B site.
When To Use It: Best used on B site executions as it helps you clear out anyone there or if they have previously peeked it could potentially deal surprising damage.
What Makes It Special: Paid with a Sova reveal or Fade haunt you will be able to guarantee free kills everytime you hit B site.
Penetration Level: Low To High
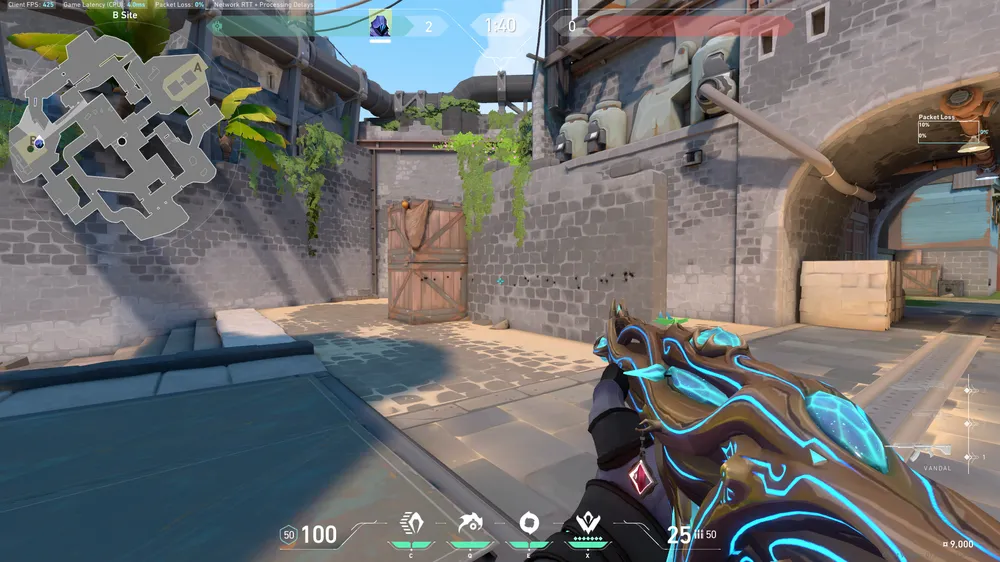
What Does It Cover: This spot is an example of the thin walls on B site that you can always use to your advantage, here you will be able to shoot anyone taking cover behind the wall and wooden box towards CT and tunnel.
When To Use It: Best used to prevent attackers from retaking the site at ease as this can deal damage and slow them down tremendously.
What Makes It Special: Paired with a teammate’s utility you will be able to hit many easy kills in these spots.
Penetration Level: Low To High
Pro Tips
- Each Wall Bang location has a specific penetration level. There are 3 types of that, Light, Medium, and Strong penetration guns that are able to break through different walls. For example, the sheriff and odin count as strong penetration weapons while the Vandal is a medium penetration weapon. Keeping that in mind helps you know when to use it and where.
- By looking at the wall, you can tell if your bullets are going through it or not. If the wall is penetrated by your bullets it will create a hole with an obvious remark that it went through. If not, there will be more like a “dent” on the wall and your bullets would have clearly not reached the other side.
- If you are worried about not having the right gun for a specific wall bang you are looking to perform, with a good economy you can keep a sheriff as your pistol which will save you in situations where you only have a Vandal or a Phantom.
- A good way to ensure you do not miss your shots through wall bangs is to ping the spot you are aiming to hit on the minimap. This will create a visual ping in front of you too which can guide you where to shoot if you forget the exact spot.
- Don’t hesitate to ask for utility from teammates or even better, play agents that can hold abilities to help you. A popular pick would be Sova as he can have set reveals for each wall bang spot essentially helping you get even more guaranteed kills with these locations.


