
How to Link Logitech G HUB with Battle.net, Riot Games, and Steam Profiles
One of the premier features of modern peripheral suites is automatic profile switching. In an ideal setup, launching a title should prompt your mouse and keyboard to instantly apply specific DPI steps, button assignments, and lighting themes. Yet, players frequently discover that Logitech G HUB fails to register when games installed via Battle.net, Riot Games, or custom Steam directories are actively running.
Here is how to properly link third-party launcher titles to Logitech G HUB to ensure your custom binds trigger reliably every time.
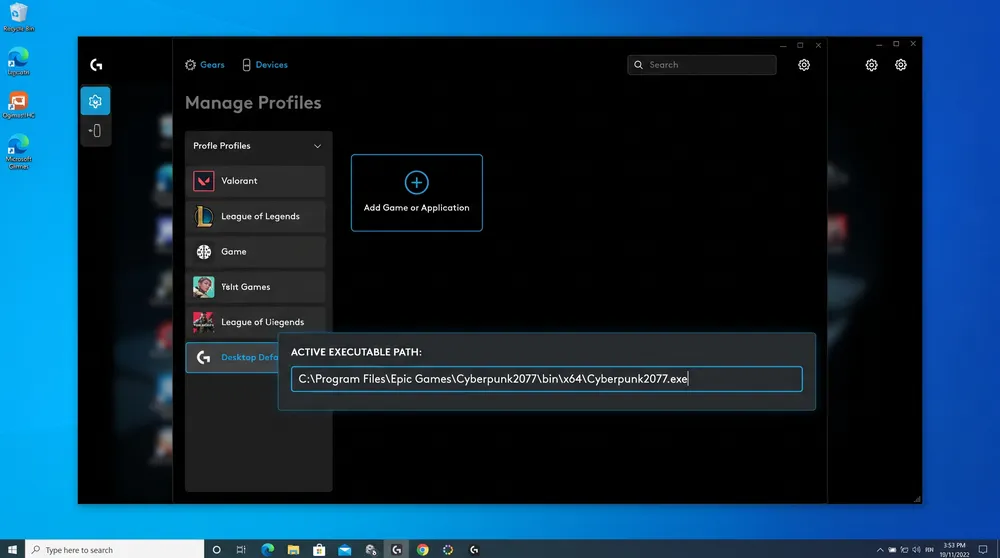
Why G HUB Fails to Detect Third-Party Launcher Games
G HUB includes an automated scanning tool designed to comb local drives for installed titles. However, modern game platforms introduce security wrappers and multi-stage launchers that confuse automated scans:
-
Launcher Shortcuts vs. Binaries: If you select the desktop shortcut for a game on Battle.net or Riot Games, you are merely pointing G HUB to the launcher launcher wrapper (e.g.,
Battle.net.exeorRiotClientServices.exe), not the actual executable running the match. -
Dedicated Anticheat Environments: Games protected by low-level services (such as Vanguard) sandbox their memory environments, often preventing basic registry scans from identifying the true game process.
-
Secondary Library Drives: Automated scans frequently look only inside default
C:\Program Fileslocations, ignoring custom install paths on secondary high-speed NVMe drives.
How to Link Games Manually via Executable Paths
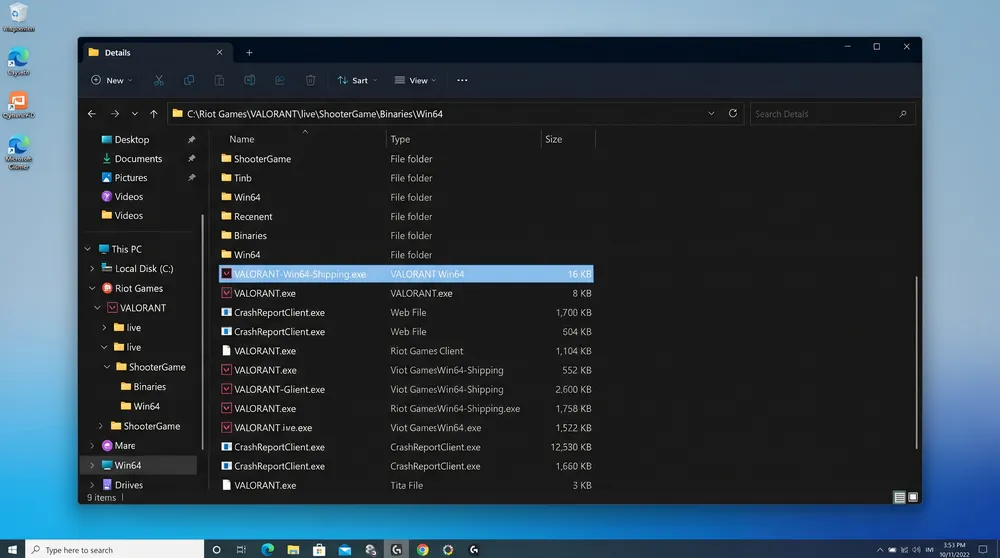
To guarantee automatic profile switching, you must manually point G HUB to the primary execution file:
-
Launch Logitech G HUB and click the active profile banner at the very top of the window.
-
Click Manage Profiles, then select the Add Game or Application button (represented by a plus icon).
-
Navigate to the actual directory housing the title's game binary rather than its frontend launcher.
Common Default Binary File Paths
| Platform | Game Title | Target Executable File Path |
|
Battle.net | Overwatch 2 | C:\Program Files (x86)\Overwatch\_retail_\Overwatch.exe |
|
Battle.net | Call of Duty / Warzone | C:\Program Files (x86)\Call of Duty\_retail_\cod.exe |
|
Riot Games | Valorant | C:\Riot Games\VALORANT\live\ShooterGame\Binaries\Win64\VALORANT-Win64-Shipping.exe |
|
Riot Games |
League of Legends |
|
|
Steam | Counter-Strike 2 |
|
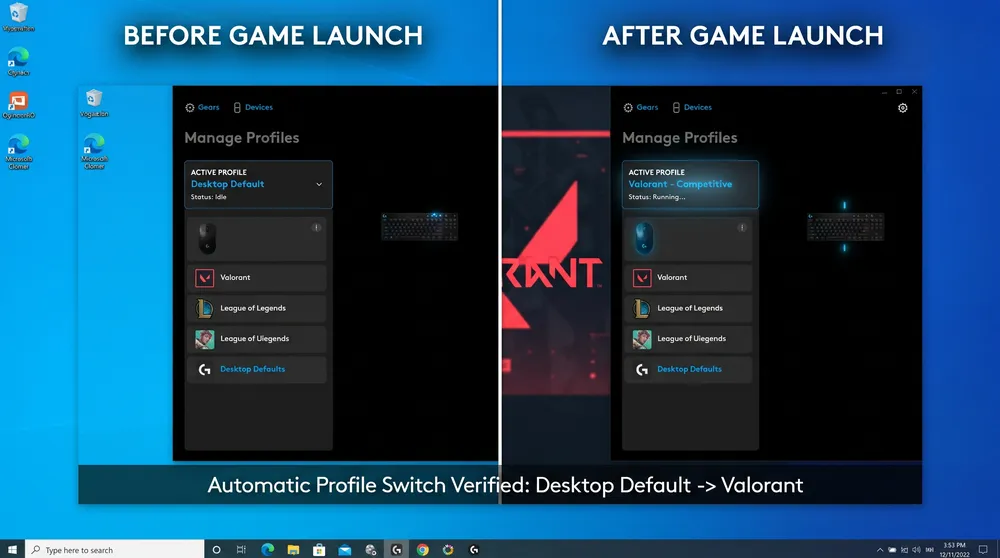
Enabling and Testing Automatic Profile Switching
Once your target binary is added to the software catalog, configure the auto-switch logic:
-
Lock the Desired Sub-Profile: Under the newly created game tab, build your key macros, DPI steps, and sensor polling frequencies.
-
Avoid the Persistent Profile Trap: Click the Settings (gear icon) inside G HUB. Verify that Persistent Profile is set to None. If a single profile is locked as persistent, G HUB will intentionally ignore game launches and force your desktop profile across all applications.
-
Test the Trigger: Launch your game through its native client. Tab out briefly to a secondary monitor or open Task Manager; G HUB's home dashboard should now show the title's custom banner as the active profile.
Using Onboard Memory Mode as an Alternative
If continuous launcher updates frequently break your profile paths, consider utilizing your device's physical hardware memory:
-
Open G HUB and select your mouse (such as the G Pro Wireless or Superlight).
-
Enter the device settings tab and toggle On-Board Memory Mode to ON.
-
Overwrite Slot 1 with your primary competitive profile.
Running onboard memory allows you to shut down background software completely, ensuring your custom DPI and macros remain active across any PC or tournament setup without requiring software background tasks.


