Pikachu Pumpkin Carving Guide: Free Stencils, Tools, and Painting Tips
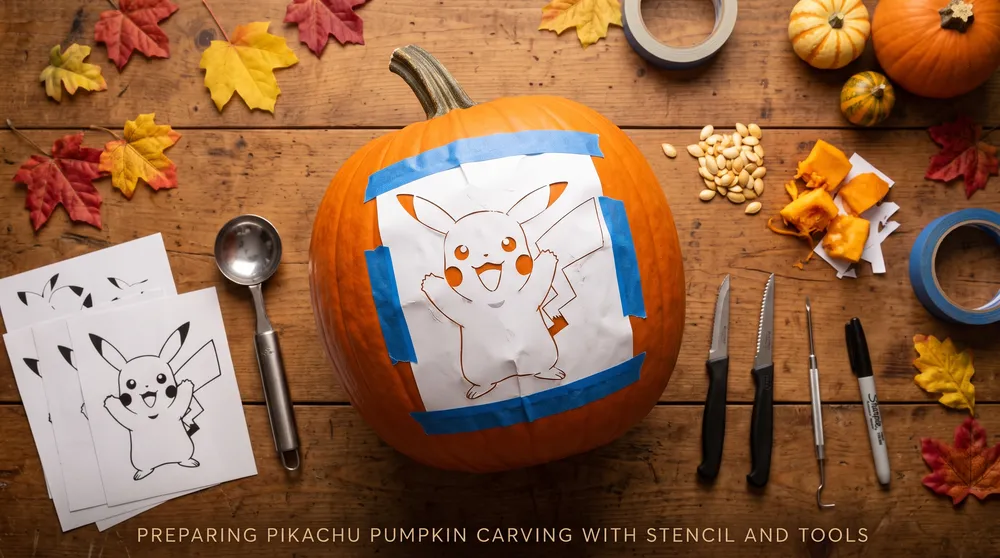
Seasonal celebrations give gamers a creative way to bring digital favorites into physical decor. Crafting a custom Pokémon jack-o'-lantern remains an annual tradition across gaming households.
Much like catching themed seasonal variants such as Witch Hat Teddiursa during Spotlight Hours, a handmade Pikachu lantern provides an instantly recognizable front-porch statement.
Here is the verified guide to carving or painting a Pikachu pumpkin, covering essential tool kits, stencil transfers, and preservation tricks.
Recommended Tools and Prep Gear
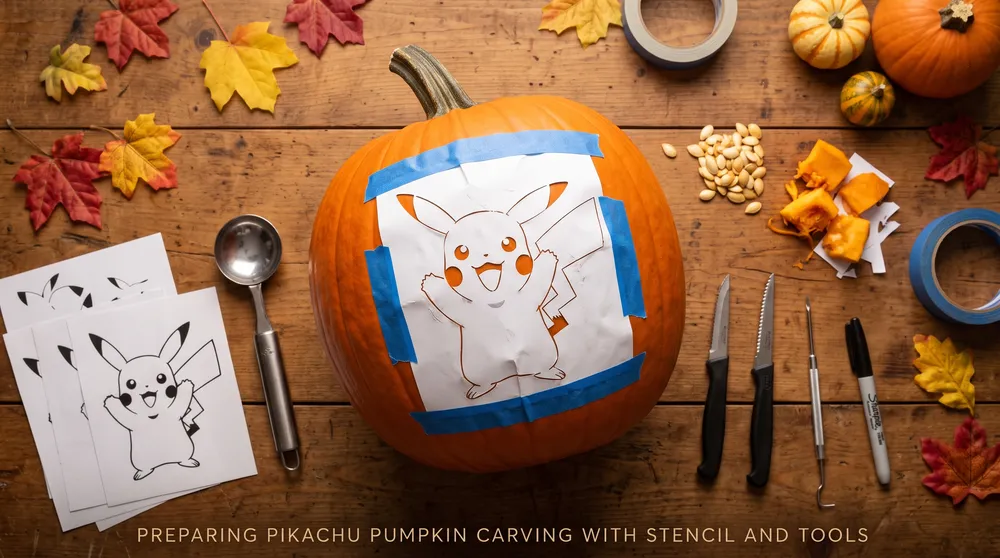
Before making the first incision, assemble proper crafting gear:
-
Medium to Large Pumpkin: Select a pumpkin with a relatively flat vertical face to ensure your paper stencil adheres evenly.
-
Fine Serrated Saws: Avoid smooth kitchen knives; they slip easily and make cutting tight ear angles difficult. Serrated craft saws allow for gradual, precise cuts.
-
Serrated Metal Scoop or Ice Cream Spoon: Essential for thinning interior walls quickly.
-
Awl or Transfer Pin: Used to punch perforations through your paper stencil directly into the pumpkin skin.
-
Battery LED Light: LED puck lights run cool, avoiding the heat damage caused by open flame candles.
Step-by-Step Stencil Carving Guide
-
Cut from the Base: Rather than cutting around the top stem, carve your access hole through the bottom of the pumpkin. This keeps the stem intact and allows you to place the hollow shell directly over your light source.
-
Thin the Carving Wall: Scrape the interior wall of your display face until it is roughly 2.5 to 3 centimeters (1 inch) thick. Thinning the rind makes delicate face cuts significantly easier.
-
Attach the Stencil: Print your Pikachu face stencil. Make small relief cuts along the outer edges of the paper so it lays flat across the curved surface, securing it with painter's tape.
-
Transfer the Outline: Trace the entire outline of the eyes, nose, open smile, and ears by punching small holes through the stencil every 3 to 5 millimeters with your transfer pin.
-
Carve Smallest Details First: Always carve the center features (the nose and mouth contours) before cutting out the large eye sections or ears. Removing large pieces early weakens the structural integrity of the shell.
-
Shading the Cheeks (Surface Peeling): For Pikachu's round electric cheeks, avoid cutting all the way through the rind. Use a linoleum cutter or clay ribbon tool to scrape away only the top orange skin layer. The exposed flesh glows with a softer amber light, creating a two-tone lighting effect.
The No-Carve Alternative: Painted Pikachu Pumpkin
For a mess-free project that lasts several weeks longer than a carved shell, painting provides a durable option:
-
Base Primer: Apply a coat of white acrylic primer to seal the porous rind.
-
Yellow Topcoat: Apply two even coats of bright yellow acrylic craft paint, letting each layer dry completely.
-
Facial Features: Use black acrylic markers to outline the large round eyes, adding white highlights to the pupils, a small triangular nose, and solid red circles for the cheeks.
-
Cardstock Ears: Cut out two elongated ear shapes from heavy yellow construction paper, paint the upper tips black, and secure them into the top of the pumpkin using wooden toothpicks.
Pumpkin Preservation Methods
Carved rinds typically dry out or develop mold within four to seven days. Extend the lifespan of your carving with these practical preservation steps:
-
Petroleum Jelly Seal: Apply a light layer of petroleum jelly along all exposed cut edges to prevent moisture loss.
-
Pre-Carve Vinegar Soak: Before carving, submerge the hollowed pumpkin in a bucket of cold water mixed with a splash of white vinegar for 20 minutes to eliminate surface mold spores.