
How to Build an Efficient Dried Kelp Farm
Hello, Minecraft enthusiasts! We're all about delving deep into the multi-layered world of our favorite sandbox game, aren't we? From battling mobs to exploring vast landscapes, there's always something exciting brewing in the world of Minecraft. Today, we'll focus on a specific aspect that may not only boost your survival skills but also propel your creativity - crafting your own dried kelp farm.
In the realm of Minecraft, kelp is not just another aquatic plant; it’s a key to sustainable living and a world of other benefits. Think of it as the underwater equivalent of wheat, providing food and other materials crucial for your in-game success. And when you have an entire farm of dried kelp at your disposal? That's the game-changer we're aiming for!
Building your own dried kelp farm isn't just a resourceful move; it's an adventure in itself. It combines exploration, strategy, and a bit of underwater gardening. So whether you're a seasoned Minecraft player or a newbie ready to delve deeper, our guide is here to walk you through every step, ensuring you can build and manage your dried kelp farm with ease. Let's dive right in!
The Journey to Kelp
Before we start laying the foundation of our future kelp empire, we first need to embark on a quest to find this valuable aquatic plant.
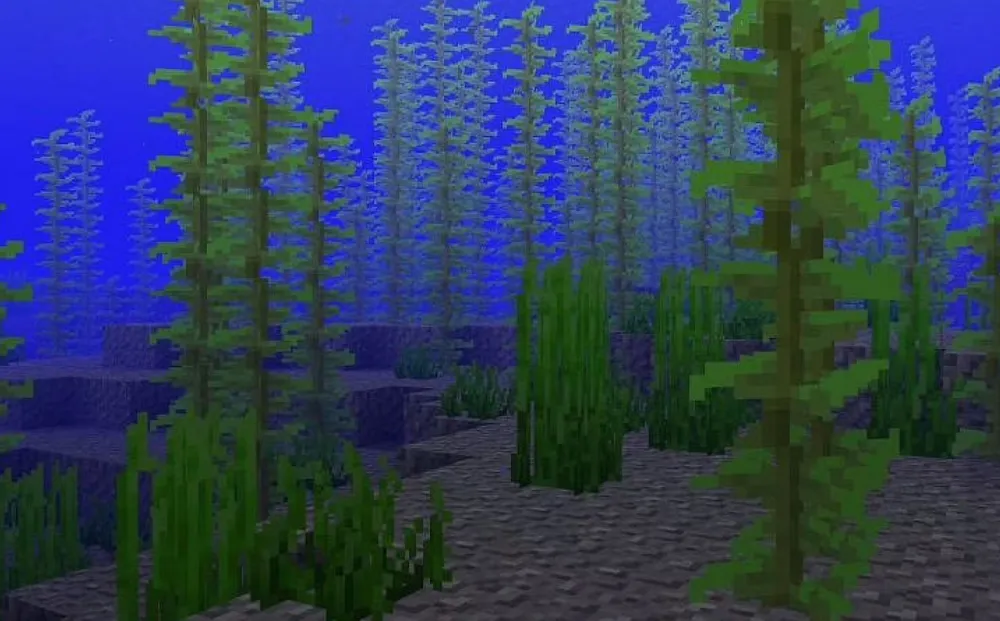
In the expansive world of Minecraft, kelp is primarily found swaying beneath the surface in the game's various ocean biomes. Think of these biomes as kelp's natural habitat - this is where it thrives! To gather kelp, all you need to do is dive in and break the plant. No special tools needed! Your trusty in-game hands will get the job done.
But what if your base isn't near an ocean, you might ask? No oceans in sight? No problem! We have a solution for our land-locked friends, too.
Say hello to Minecraft's enigmatic Wandering Traders. These nomadic merchants have been known to carry kelp amongst their assortment of goods. A small investment of roughly three emeralds should suffice to obtain the coveted kelp. Just a tip though, these traders can be a bit whimsical, so keep an eye out for them during your travels.
Whether you dive into oceanic depths or trade with wandering merchants, once you've got your hands on kelp, you're ready for the next stage - setting up your underwater greenery!
Choosing the Perfect Location
Now that we have our hands on some kelp, it's time to pick the perfect home for our future underwater garden. Selecting the right location for your kelp farm is a crucial step in your Minecraft farming journey, and here's why.
Kelp, as a true child of the ocean, has specific needs that we must cater to. First and foremost, it must be planted on a block situated beneath a water source. So, look for an area where water is aplenty. It could be an ocean, a large pond, or even a man-made water feature in your base.
Unlike some of your typical crops in Minecraft, kelp isn't picky about light. Whether it basks in the brilliance of sunlight filtering through water, or sits in complete darkness, it'll grow just fine.
Finally, your kelp farm doesn't need an open view of the sky above. That's right, it's one of those rare plants in Minecraft that can grow without needing direct access to the sky. This opens up possibilities for setting up your farm indoors, underground, or within hidden bases if secrecy is your thing.
However, while choosing your location, remember to consider your convenience too. Will you be able to easily access and maintain the farm? Is there a possibility for expansion if you wish to upscale in the future? Once you've taken these factors into account, you'll be ready to lay down the foundations of your kelp farm. Next up, let's start building!
Building Your Kelp Farm: The Basic Approach
Ready to turn your aquatic farming dreams into a reality? We're all set to start crafting our kelp farm! To ease you into the process, we'll begin with a straightforward, basic approach that's perfect for beginners or anyone who prefers a more hands-on farming experience.
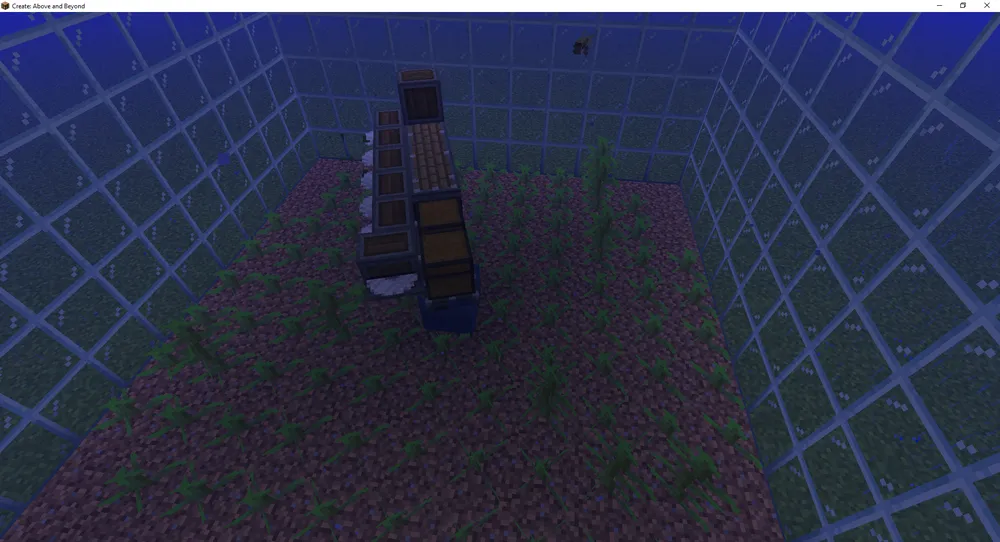
Prepping the Site: Begin by clearing your chosen site of any obstacles that might hinder the growth of your kelp. This could be other plants, rocks, or stray blocks that found their way underwater. You want a clean, clear space for your future farm.
Planting the Kelp: With the area prepared, it's time to get planting. Simply dive beneath the water's surface, aim at the block you wish your kelp to grow on, and right-click or tap on the screen (for console or mobile users) with kelp in your hand. And voila! Your first kelp plant is in the ground.

Letting Nature Take Over: The beauty of this basic approach lies in its simplicity. Once your kelp is planted, you can sit back and let nature do its work. Your kelp will begin to grow, rising higher and higher until it reaches the water's surface. There's no daily watering or specific care routine required, just some patience and an occasional check-in to see how your underwater garden is growing.
Harvesting Your Kelp: When your kelp has grown tall, it's ready for harvesting. To harvest, simply break the bottom-most part of the kelp plant, and watch as the entire plant breaks, leaving behind floating kelp ready for collection.
There you have it! With these easy steps, you've got yourself a basic, manual kelp farm up and running. This farm might require you to roll up your sleeves and do the work manually, but it also offers a charm and simplicity that many players love.
Ready to step things up a notch? Let's explore a more advanced approach in the next section.
Building Your Kelp Farm: The Advanced Method
If you're the kind of Minecraft player who loves a dash of complexity and automation, this method is for you. It's time to introduce some redstone magic into our kelp farming, transforming it into a well-oiled, automated production line. Don't worry, we'll break it down into easy-to-follow steps.
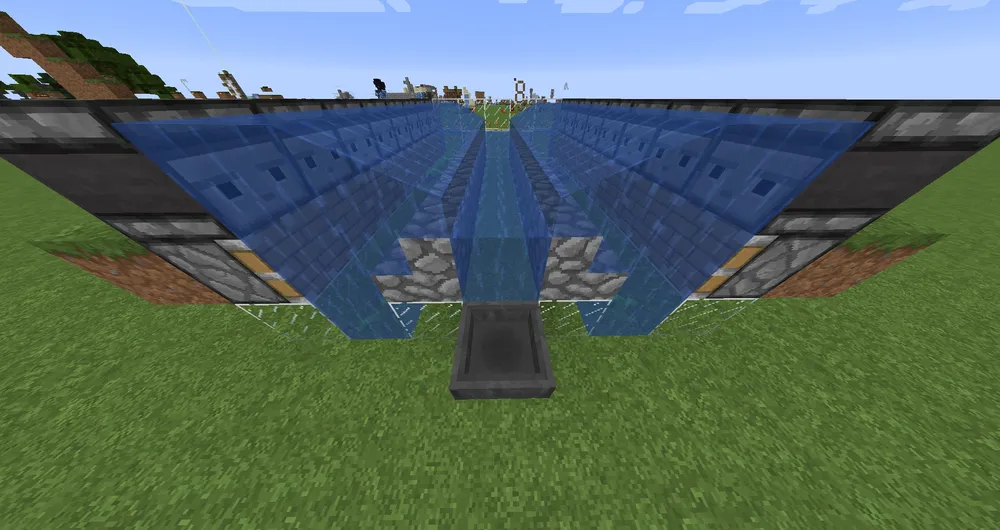
Designing the Framework: Start by deciding the dimensions of your automated farm. Remember, the larger it is, the more kelp it will produce. However, a bigger farm also means a more complex redstone system. Once you've decided on the size, create the main structure using blocks of your choice and ensure it can hold water for your kelp to grow.
Planting Your Kelp: As with the basic method, you'll need to plant your kelp. Be sure to give each kelp plant enough space to grow.
Setting up the Redstone System: Now comes the most intricate part - setting up the redstone system. You'll need to set up pistons at the top of your water column. These pistons, powered by redstone, will break the kelp once it grows to the water surface.
Creating a Collection System: To collect the broken kelp automatically, you'll need to create a water stream at the bottom of your farm that directs all the items to a central collection point. From here, you can have hoppers feeding into chests for easy storage.
Tweaking and Maintenance: With the system in place, test it out by growing some kelp. It's normal to need a few tweaks here and there to get things running smoothly, so don't fret if it's not perfect the first time around. Maintenance is as simple as occasionally checking your redstone connections and ensuring the collection system is functioning properly.
Conclusion
Well, look at you! You've embarked on a journey into the depths of Minecraft's oceans, ventured into trading with elusive Wandering Traders, and planted the seeds of your very own underwater empire. Whether you chose the simplicity of manual farming or the intricate joy of an automated kelp farm, you've proven yourself to be a true Minecraft innovator!
But remember, building your kelp farm is just the beginning. From maintaining your farm, to harvesting, to discovering the multitude of ways dried kelp can enrich your Minecraft experience, your adventure is just getting started. Dried kelp, with its versatility, is truly a testament to the phrase "small but mighty". As you delve deeper into the world of Minecraft, you'll find these humble green fronds could make a big difference in your gameplay.


