Best Controller Settings for Apex Legends

Ready to level up your Apex Legends game with a controller? You're in good company. More top-tier players are making the switch to controllers than ever before, especially as the game's weapon meta leans towards SMGs over shotguns. But with a plethora of controller configurations out there, how do you know which settings will make you a legend?
Think of it like fine-tuning your mouse sensitivity; it's all about finding that sweet spot. While everyone's ideal setup is unique, let's talk about the ultimate starting guide for newcomers to controller gameplay in Apex Legends.
Best controller settings for Apex Legends
So, you're a controller warrior, or you're thinking about becoming one? In Apex Legends, your settings can be the fine line between a win and a loss, between glory and defeat. Here's a blueprint for controller settings that even the pros would nod at.

Button Configuration
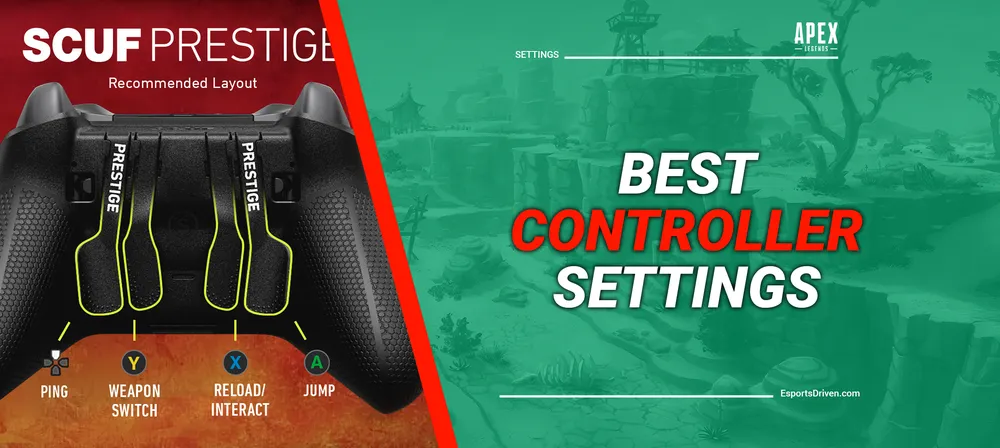
Button Layout: Go with Button Puncher. Why? It switches your Melee and Crouch buttons, allowing you to crouch-slide effortlessly without ever lifting your thumb from the aiming stick. Remember, in Apex, movement is your best friend.
Interactions and Controls
- Stick Layout: Stick with Default. No pun intended.
- Interact/Reload Button: Set it to 'Tap to Use and Reload.' Why fumble with buttons when you can swiftly loot and reload with a simple tap? Hold the button if you're aiming to do something more, like reviving a teammate.
- Crouch Button: Use the Toggle setting. It simplifies aiming while crouching. However, if you're a fan of the crouch-spamming dance during gunfights, you might prefer the 'Hold' setting.
- Aim Button: Keep it at 'Hold' for quicker response times.
- Survival Slot Button: On. Makes accessing heat shields and other survival gear a breeze. But if you find yourself too enamored with your heirloom to focus, maybe switch it off.
Sensitivity Settings

- Trigger Deadzones: Keep it at default unless your controller is acting up.
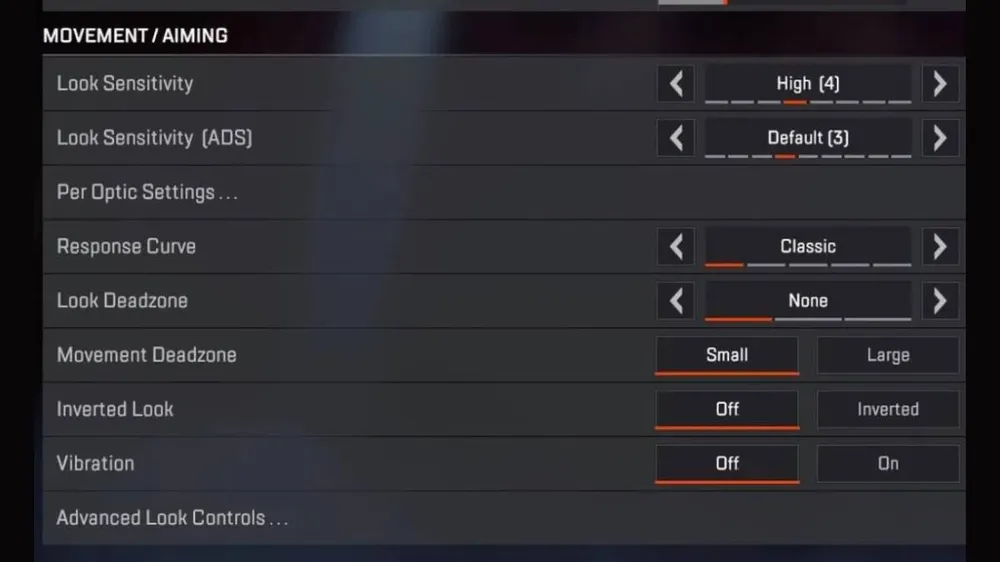
- Look Sensitivity: High (4). Gives you better tracking ability.
- ADS Sensitivity: Default (3). One notch down for that precise aiming.
- Per Optic ADS Sensitivity: Off. Unless you're an optics aficionado and want to fine-tune each one, keeping this off maintains consistency.
Finer Details
- Look Deadzone & Movement Deadzone: Small. It minimizes stick drift, allowing for more accurate movements and aiming.
- Inverted Look: Off, unless you come from a galaxy where up is down and down is up.
- Vibration: Off. While it might make the game feel more immersive, turning it off is a pro tip for better aiming.
Your settings, your game, your wins. Customize as you see fit, but this guide offers a solid foundation for anyone serious about taking their Apex Legends gameplay to the next level.
Best advanced look control (ALC) settings for Apex Legends

So, you've graduated from basic controller settings, and you're ready to fine-tune your gameplay. Enter Advanced Look Controls (ALCs), the gateway to a whole new level of precision and responsiveness. Some of the biggest names in Apex, like Genburten and Knoqd, swear by it. Here's how to get started.
The Magic of Deadzone Management
ALCs are the gold standard for deadzone fine-tuning. Begin with a ballpark figure of about 15%, but your aim is to dial that number down as low as you can. As you encounter stick drift over time, you may need to nudge it up by 1%. But remember to minimize the deadzone once you get your hands on a new controller!
Tailoring Your Response Curve
The Response Curve sets the stage for how your joystick inputs are translated into in-game movements. A setting of 8 approximates the Classic curve, while a setting between 0-3 emulates a Linear curve. Choose the curve that feels most natural for you and tweak from there.
Yaw and Pitch: Your Dynamic Duo
In ALCs, Yaw refers to your horizontal movement speed, while Pitch governs the vertical. Always aim to keep your Yaw speed higher than your Pitch. A quick way to gauge this is to multiply your standard in-game sensitivity by 50. For example, if you play at 4-3, your Yaw would start at 200. For your Pitch, aim for about 75% of your Yaw as a starting point.
Embrace the Adjustment Period
Switching to ALCs is not a "set it and forget it" deal. You'll need some time to adapt, especially as you're tweaking the settings to find your perfect setup. So, go easy on yourself during this period of calibration.
With ALCs, you're not just another player in the Apex arena—you're a finely tuned machine, ready to become a Legend. So dive in and start customizing; your next win is just a perfect setting away!
How to test your Apex Legends controller settings

So, you've dived into the labyrinth of controller settings and emerged with a configuration you think could make you the next Apex Legend. Now what? It's time to put those settings to the test.
The Firing Range: Your Personal Sandbox
Apex Legends offers a gem called the Firing Range—a sandbox filled with all the weapons and attachments you could ask for. It’s your playground to experiment and perfect those controller settings before leaping into the intense arena of real-world gameplay. You can shoot at stationary targets to get the feel of your new setup.
Elevate Your Firing Range Session
Pro Tip: For a more dynamic experience, invite a buddy to join your Firing Range session. Enable friendly fire and engage in some good old-fashioned 1v1 dueling. It’s the ultimate way to test your settings against a live, unpredictable target or just show off your newfound skills.
The Art of Incremental Changes
Tempted to go all in and revamp your entire control scheme? Slow down, hotshot! The key to successful adjustment is to make small, incremental changes. Even pros need time to get comfy with new sensitivities or controller layouts.
Remember, Rome wasn't built in a day, and neither are Apex Legends champions. Each tweak you make brings you one step closer to becoming a true Legend. So head to the Firing Range, and may your aim be ever true!
The FOV Factor: How Field of View Influences Your Aim in Apex Legends

Ever wondered if tweaking your Field of View (FOV) could make or break your performance in Apex Legends? Spoiler alert: It absolutely can.
The Bigger Picture
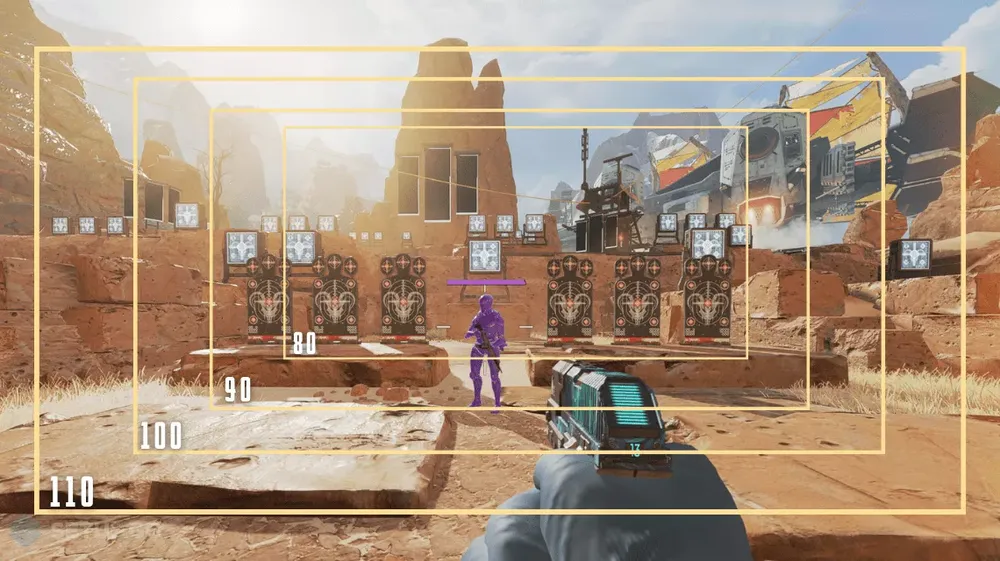
At its default, the FOV is set to 70, offering you a relatively narrow perspective. While bumping this number up can be a game-changer—literally—it allows you to see more of your surroundings, making it easier to spot threats or opportunities.
The Double-Edged Sword
However, be cautious: cranking up the FOV too high isn't always a win. Doing so might make distant enemies appear smaller, making your aim less accurate. Yes, a wider view can sometimes translate into missing the mark.
The Quest for the Sweet Spot
There's a Goldilocks zone in FOV settings, especially for those on a controller. But the 'just-right' setting can differ from player to player. The trick is to find that balance where increased awareness doesn't compromise your sharpshooting skills.


